

My older sister is pregnant with twin girls so I couldn't resist making them some cute outfits!
Her husband, E.J., said that he didn't want the girls matching all the time. I decided to listen
to him this one time and make the girls outfits that were the same style, but different fabric.
I purchased this adorable pattern from Sew, Mama, Sew!. It's by Sis Boom and called
the Carly Bubble Romper. It's a bit pricey, ok, really pricey. But totally worth it. There are 3
different sleeve options and can be made in sizes preemie-24months. When I have
a tiny baby again this pattern will be used many times!
The pattern itself is incredibly easy to understand. I only had two issues, one being that
I didn't quite understand how to sew the legs holes so I did my own thing. I ended up
turning them in and sewing two lines, then feeding the elastic through.
The second issue was with the snap closure. The pattern says to use interfacing where the
snaps will be, but I think this caused the fabric to be too thick and I had some issues
getting my snaps to stay. I even had my hubs try a few of them...let's just say
we went through two packages of snaps trying to get them on really tight!
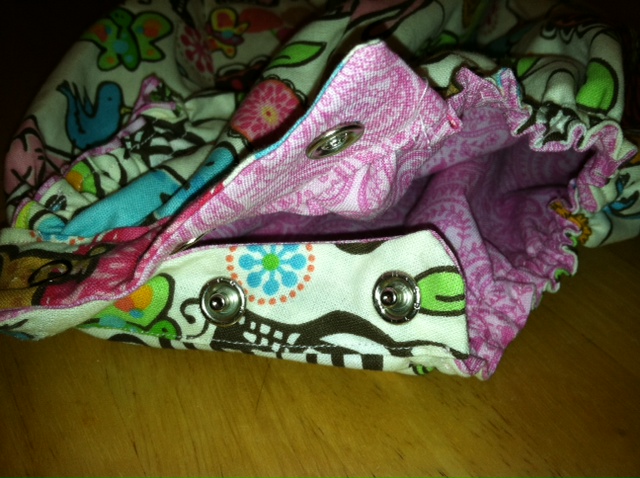
The next time I make this pattern I won't use the interfacing. However, I did
purchase a cheapo snap fastener from Walmart. It only costs me $12 and the
snaps were $3.58. If you have a heavy duty snap fastener than I'm sure you'll
be fine using the interfacing!

You don't have to have a snap closure either. Buttons would be fine too!
The romper is completely lined and will easily fit the twins for awhile.
I made size 3m but with it being a 'bubble' romper I think it could easily
fit 1month to 4months+!


Sorry, I can't figure out why some of the pictures are right side up! Dang blogger...
All the fabric was purchased from Hobby Lobby. My favorite print, the pink/teal/black animals is from their spring collection at $8.99(!) a yard, so make sure you print off a coupon from their website! I, of course, printed mine off and then forgot to hand it over during checkout. Guess that what happens when you have a 3yr old and almost 2yr old not following directions...


