Pages

Showing posts with label Toy. Show all posts

Thursday, December 29, 2011

Stroller Refashion

And I'm back!! Who missed me?! 

I wish I could say I took a bit of time off from blogging to spend time with my 
family and just relax, but that would be a lie. I did spend lots of time with 
my family but not much relaxing was done... I had a million gifts to make, 
and buy, and wrap. 6 Christmas' to attend. Ya know, the usual.

But I'm back and should be back to regular blogging now!  

What was my first project after the holidays? A stroller refashion!

I was hoping to get this done for Gianna before Christmas but
that didn't happen. Oh well, Gianna didn't know the difference.
She's just happy she has a stroller that her babies don't fall out of!

Back to the stroller refashion....

A favorite blogger of mine, Sewing in No Man's Land, did a 
'pimp my stroller' post a while ago. 
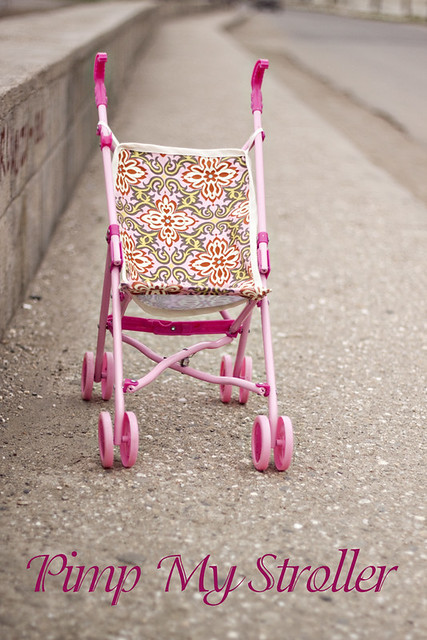


Since then I've been wanting
to fix Gianna's stroller cover. We bought the stroller from Goodwill
and a few days later the cover started falling apart, of course!
But, for a few bucks, I couldn't complain. 

I grabbed some bias tape and scrap fabric from my stash
and set to work! The great thing about the 'pimp
my stroller' tutorial is that she even includes a free pattern!

It's a really easy tutorial to follow, even for the beginner sewer.
Plus, kiddos don't usually care if there are a few mistakes,
which makes this a great learning experience! 

Mine turned out ok...not as good as I expected.
But I did have a 18 month old trying to help, so I guess 
I can blame her for my mistakes ;-)


Saturday, November 26, 2011

DIY Cast for Doctor's Kit

Awhile ago, I made Gianna a Doctor's coat to go with her 
Doctor's kit I bought her for Christmas. 


And then this weekend my mom had this genius idea, to add her kit...
a DIY play cast!!

She bought some Go-Go boot covers on clearance after
Halloween.  First they were just going to be thrown in Gianna's
dress up bin, but they she mentioned I should just make them into a cast
for her doctor's kit! Can you say, genius?!

Mine were similiar to this, only it already had the elastic around the bottom.


I added elastic to the top, to keep it up the teeny tiny kiddo thighs. 
And ta da! Cheap, easy DIY Cast. The kids are going to love playing with this!

Friday, April 22, 2011

Hobo Sack


I was trying to think of something different and fun to give my cousin's son for his birthday (he's turning 2). A million ideas ran through my mind and then I found this tutorial-for a hobo sack! What kid doesn't love a bag to carry around all their goodies in?
Sorry-pic taken from my phone!

Dana from Made did a great job with the tutorial. It was very easy to follow and didn't take long at all. I originally made one from her dimensions but it was tiny. I went ahead and whipped up another one that was 13 x 16. It's the perfect size and will be perfect for me to fill with some books, trucks, etc for the birthday boy!

I also added a monogram letter-which was incredibly easy! I didn't take pictures during these steps but I'll explain what I did.

1.) I used my Cricut Cutter to cut out a T on normal paper.
2.) I cut a piece of red knit fabric
3.) I placed the piece of paper (freezer paper works better because you can iron it on, but I didn't have any one hand).
4.) I used a large paint brush and white fabric paint, and painted on the T!
5.) Yes, pretty self explanatory. My Cricut made it extra easy.

I really hope he loves his new, personalized bag! I know it's now my favorite new birthday gift to give-I may be making every kiddo I know one for their birthday!