
Thursday, October 24, 2013


Monday, July 16, 2012
No Sanding Required!

I've been seeing all over Pinterest tutorials for refinishing a dresser (or any piece of furniture) without sanding or stripping it first...sounds amazing, right? So I had to try it of course!
I found a great deal on a dresser (FREE!) through a friend on Facebook.
I just posted I was looking for one and someone was wanting to get rid of theirs.
Score! Once Jeff brought it home he said he couldn't image it looking good..it
was in sad shape. It had initial scratched into the laminate surfaces...which covered the
whole surface of the dresser. Jeff did say he trusted me to make it look
good, but he was skeptical ;-)

To start I filled all the scrapes/gouches with wood filler and let it dry. Then sanded
it down to as smooth as possible. Next I just applied two layers of Glidden
Gripper Primer in Gray. You could probably get away with one but I did
two, just to be sure it was nice and coated.
After that was completely dry I painted the dresser with two coats of
Kensington Clark Natura in Iced Green (Ace Hardware).
To finish it I had my hubs spray the whole dresser and drawers
with Rustoleum Clear Painter's Touch in Satin. I just feel
like this sets the paint in and reduces chips/scratches in the paint.
I even tried to sand the paint off in a small area and there was no damage.
Second score! That gripper stuff really works!
For the knobs I used the original ones, using Rustoleum Oil Rubbed Bronze
spray paint. For the pulls I bought some on clearance at Menard's for $2.49
and painted them the same color.
Overall the dresser cost me less than $20 (I used paint I already had on hand).

SUCH a great deal and I love how it turned out. Perfect for the new nursery!
Featured in Fleece Fun!
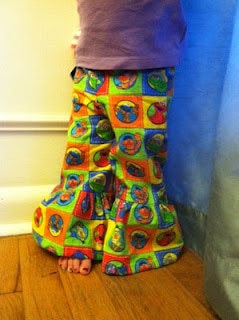
I'm way behind on this posting but better late than never, right?! Awhile back Angel from
Fleece Fun saw that I made a pair of her boutique style pants for G. and then asked
if she could feature me on her blog. Heck yes!!
Her blog has a ton of free patterns and tutorials for clothing and accessories.
I love it! Plus this was my first 'feature' on another blog so I'm pretty excited and
proud of myself!
Tuesday, February 14, 2012
The Carly Bubble Romper

My older sister is pregnant with twin girls so I couldn't resist making them some cute outfits!
Her husband, E.J., said that he didn't want the girls matching all the time. I decided to listen
to him this one time and make the girls outfits that were the same style, but different fabric.
I purchased this adorable pattern from Sew, Mama, Sew!. It's by Sis Boom and called
the Carly Bubble Romper. It's a bit pricey, ok, really pricey. But totally worth it. There are 3
different sleeve options and can be made in sizes preemie-24months. When I have
a tiny baby again this pattern will be used many times!
The pattern itself is incredibly easy to understand. I only had two issues, one being that
I didn't quite understand how to sew the legs holes so I did my own thing. I ended up
turning them in and sewing two lines, then feeding the elastic through.
The second issue was with the snap closure. The pattern says to use interfacing where the
snaps will be, but I think this caused the fabric to be too thick and I had some issues
getting my snaps to stay. I even had my hubs try a few of them...let's just say
we went through two packages of snaps trying to get them on really tight!
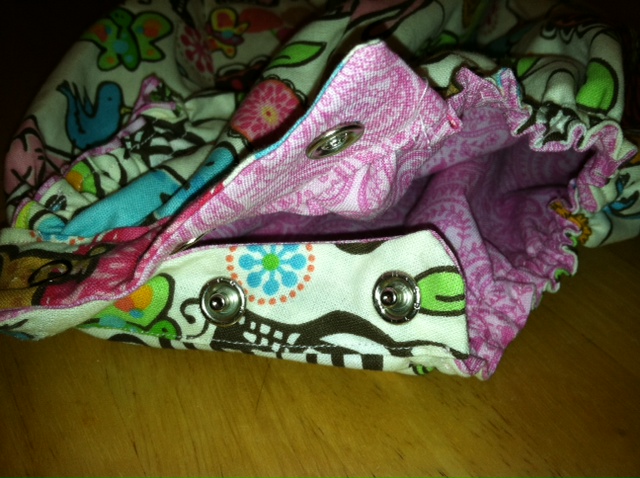
The next time I make this pattern I won't use the interfacing. However, I did
purchase a cheapo snap fastener from Walmart. It only costs me $12 and the
snaps were $3.58. If you have a heavy duty snap fastener than I'm sure you'll
be fine using the interfacing!

You don't have to have a snap closure either. Buttons would be fine too!
The romper is completely lined and will easily fit the twins for awhile.
I made size 3m but with it being a 'bubble' romper I think it could easily
fit 1month to 4months+!


Sorry, I can't figure out why some of the pictures are right side up! Dang blogger...
All the fabric was purchased from Hobby Lobby. My favorite print, the pink/teal/black animals is from their spring collection at $8.99(!) a yard, so make sure you print off a coupon from their website! I, of course, printed mine off and then forgot to hand it over during checkout. Guess that what happens when you have a 3yr old and almost 2yr old not following directions...
Sunday, February 5, 2012
The Rita Skinny
Shwin Designs just launched their Spring Pattern Collection and, of course, they have some
adorable patterns! Right away I knew I wanted to make G the "Rita Skinny". I think next
I want to make the "Maggie Mae Tunic". I just checked out their flickr group and love what
some of the other sewers did with the tunic pattern!
Back to the Rita Skinny though. The pattern was very easy to read and put together.
My only issue is that Gianna is in between an 18M and 2T. I made the 2T pattern
with the 18M length. I wanted the pants to be more ankle length or even capris.
They are a bit big still, but hopefully they will fit perfect when spring is finally here!
I just love them! I think they actually look like store bought pants, which is what
I'm always going for.

 |
| Rolled up for capris! |
 |
| Love the button details |
 |
| And pockets in the back! |
After a few bribes, I got Gianna to do a 'photo shoot'. She may or may
not have been bribed with croutons...she loves those things!


not have been bribed with croutons...she loves those things!


How can you not love these jeans?! Probably the best pant pattern
I have ever bought/used!
I have ever bought/used!
Subscribe to:
Posts (Atom)